Manipulating and partitioning hardisk can be a daunting task, especially for new sysadmin and if the disk has already contain data. Luckily, there is a tool that make this task easier, and that tool is called cfdisk.
First, we need to identify our disk name. This can be achieved by running lsblk
Above is a sample output of lsblk. We can see that our disk name is sda (append /dev/ to the name for full path), and it has 130GB size. We can also see that only around 30GB has been used. We should have 100GB worth of free space for our new partition.
To start using cfdisk, just run it against the path of our disk, in this case /dev/sda
$ sudo cfdisk /dev/sda
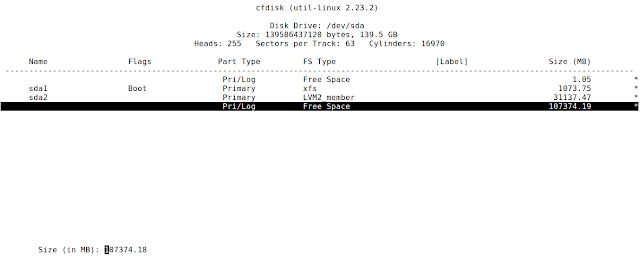
Move the cursor using the down arrow key on our keyboard, so that the cursor lies on the 107374.19MB line
Make sure your cursor is at "New" button, and press Enter.
Choose "Primary" and press Enter.
We want to use the whole free space, so just leave the size as it is, and press Enter.
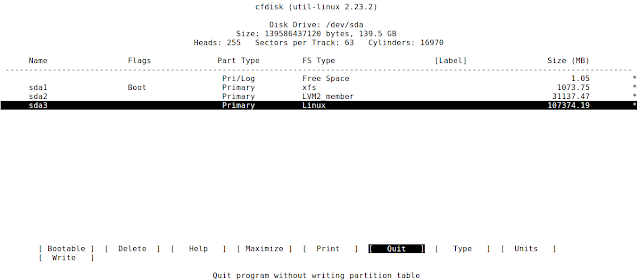
We now have a partition ready. To actually write the partition to the partition table, move your cursor using the right arrow key on the keyboard until it reached the "Write" button, and press Enter.
We will get this message once the partitioning is complete.
Quit cfdisk by choosing "Quit" and press Enter
Eventhough we have created the partition, but sometimes the partition table is not automatically updated. Run "partprobe" to inform the OS of the partition table change.
$ sudo partprobe
Use "lsblk" to see that the new partition has been created
$ lsblk


No comments:
Post a Comment